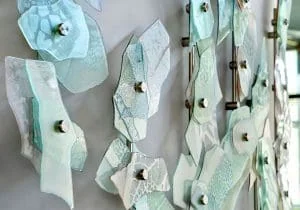
Transform your space with a stunning floating acrylic photo gallery! This DIY project is perfect for adding a modern, polished look to your walls while showcasing your favorite memories. Whether you’re a seasoned DIY enthusiast or a beginner looking for a fun and rewarding project, creating a floating acrylic photo gallery is an achievable way to elevate your home decor. With a little time, creativity, and the right tools, you’ll have a professional-quality display you’ll treasure for years. Follow our step-by-step guide to create your own masterpiece using Nova Display® framing products.
The beauty of acrylic frames lies in their sleek, minimalist design, which gives your photos a “floating” effect that draws attention without overwhelming your space. Unlike traditional frames, acrylic panels offer a crystal-clear view of your images, making them perfect for showcasing everything from family portraits to travel snapshots or even professional artwork. Plus, the installation process is straightforward and doesn’t require advanced skills, making it an ideal weekend project for anyone looking to refresh their walls.
This project is also a fantastic way to personalize your home. Imagine walking into a room and seeing your most cherished moments—your child’s first birthday, a breathtaking vacation sunset, or a milestone celebration—beautifully displayed in a modern, eye-catching format. With Nova Display® acrylic frames and standoff mounts, you can create a gallery that’s uniquely yours, tailored to your style and space. Whether you’re decorating a living room, office, or hallway, this DIY project adds a touch of sophistication that’s sure to impress.
Ready to dive in? We’ve got you covered with everything you need to know, from selecting the perfect frame to installing it with precision. Let’s walk through the process together and turn your vision into reality!
What You’ll Need
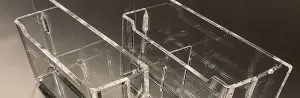
- Nova Display® Acrylic Frames (Frameless Sandwich Panels)
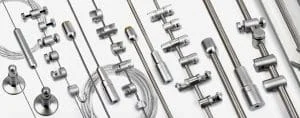
- Nova Display® Standoff Mounts
- Nova Display® Wall Anchors
- Drill and Drill Bit (1/8” or 3/16” recommended)
- Screwdriver
- Level
- Removable Double-sided Scotch Tape
- Your Favorite Photos
Note: Items like the drill, level, and tape can be found at your local hardware store.
Step-by-Step Instructions
Step 1: Choose and Order Your Acrylic Frame
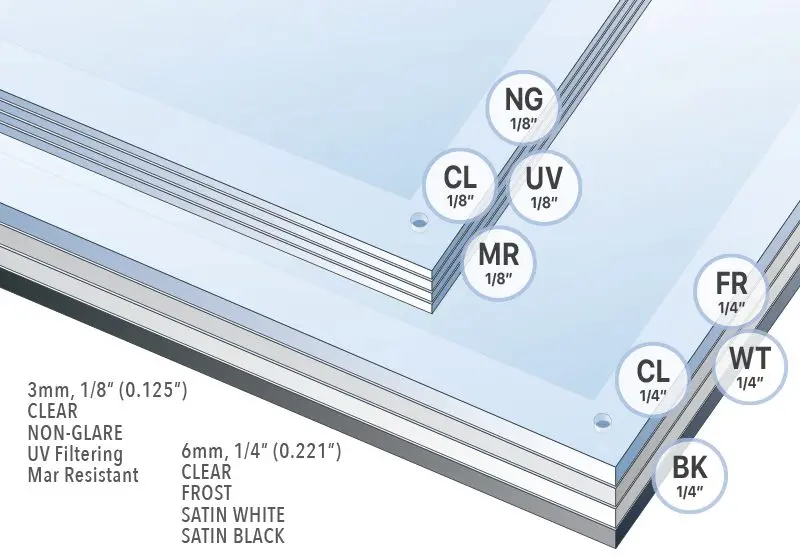
Select the perfect acrylic frame size for your project. We recommend Nova Display® clear or non-glare acrylic frames for a sleek, professional look. Explore our full range of options on the Nova Display webstore, including:
- Standard or custom sizes
- 1/8” or 1/4” thick backing
- Frosted or matte black back panels
- Straight or rounded corners
- Economy clear or deluxe non-glare finishes
Note: Order your frame and ensure it arrives pre-drilled for standoff mounts, complete with protective masking on both sides.
Step 2: Mark the Wall for Drilling
Your Nova Display® acrylic frame comes with a pre-drilled back panel (typically the thicker of the two panels). Use this panel as a template to mark drilling points on your wall:
- Enlist a helper to hold the panel against the wall in your desired position.
- Use a level to ensure the panel is perfectly aligned.
- Trace the pre-drilled holes onto the wall with a pencil, ensuring the markings align precisely with the hole centers.
- Double-check your measurements to confirm even spacing and alignment.
Step 3: Drill Holes and Install Wall Anchors
- Select a drill bit (1/8” or 3/16”) that matches the size of the Nova Display® twist-n-lock drywall anchors included with your frame set.
- Carefully drill holes at the marked points.
- Using a screwdriver twist to insert the white plastic drywall anchors into the drilled holes, ensuring they are flush with the wall. Repeat for all marked points.
Step 4: Install Standoff Mounts
- Attach the standoff barrels or wall plugs (for 3-part standoffs) to the drywall anchors.
- Secure each standoff base with the provided screws, ensuring they are firmly in place.
- Repeat until all standoff bases (typically four per frame) are installed.
Step 5: Prepare and Add Photos to the Acrylic Frame
- Carefully remove the protective masking film from both the front and back acrylic panels to keep them clean.
- Place your chosen photo on the back acrylic panel (the thicker one).
- Use a small piece of removable double-sided Scotch tape to secure the photo in place, ensuring it’s centered.
- Stack the front acrylic panel on top, aligning the edges and pre-drilled holes.
Step 6: Mount the Frame to the Wall
- Position the assembled acrylic frame (with the photo sandwiched between panels) onto the installed standoff bases.
- Secure the frame by screwing the front standoff caps into place.
- Tighten each cap gently but firmly, ensuring the frame is stable and secure.
- Step back and admire your floating acrylic photo gallery!
Tips for Success
- Cleanliness is Key — Handle acrylic panels with clean hands or gloves to avoid smudges or fingerprints.
- Double-Check Alignment — Use a level at every step to ensure a professional, polished look.
- Experiment with Layouts — Create a gallery wall by combining multiple frames in different sizes for a dynamic display.
- Photo Selection — Choose high-resolution images for the best visual impact.
Why Choose Nova Display?
Our acrylic frames and standoff mounts are designed for durability, clarity, and ease of installation. Whether you’re displaying family photos, artwork, or certificates, Nova Display® framing products offer a modern, floating effect that elevates any space. Ready to get started? Visit the Nova Display webstore to explore our full range of acrylic frames and accessories.
Happy framing!

- For more detail product information, configurations, and customizations visit our website: novadisplay.com
- To purchase standard components and accessories visit our web store: novadisplaysystems.com
- If you have special requests or require help with a custom design or fabrication, please contact us.
- If you have any suggestions or would like to send your feedback, please fill out the form here.